Showing posts with label butterflies. Show all posts

Friday, 16 March 2018

Just Playing Around

The other day on a FB quilling group I belong to, someone asked 'what do you do with your quilled projects?'

I make mine to keep my hands busy and, of course, to sell. I have found that my ornaments and cards sell pretty well but the question got me thinking. What else can I make that might sell too?
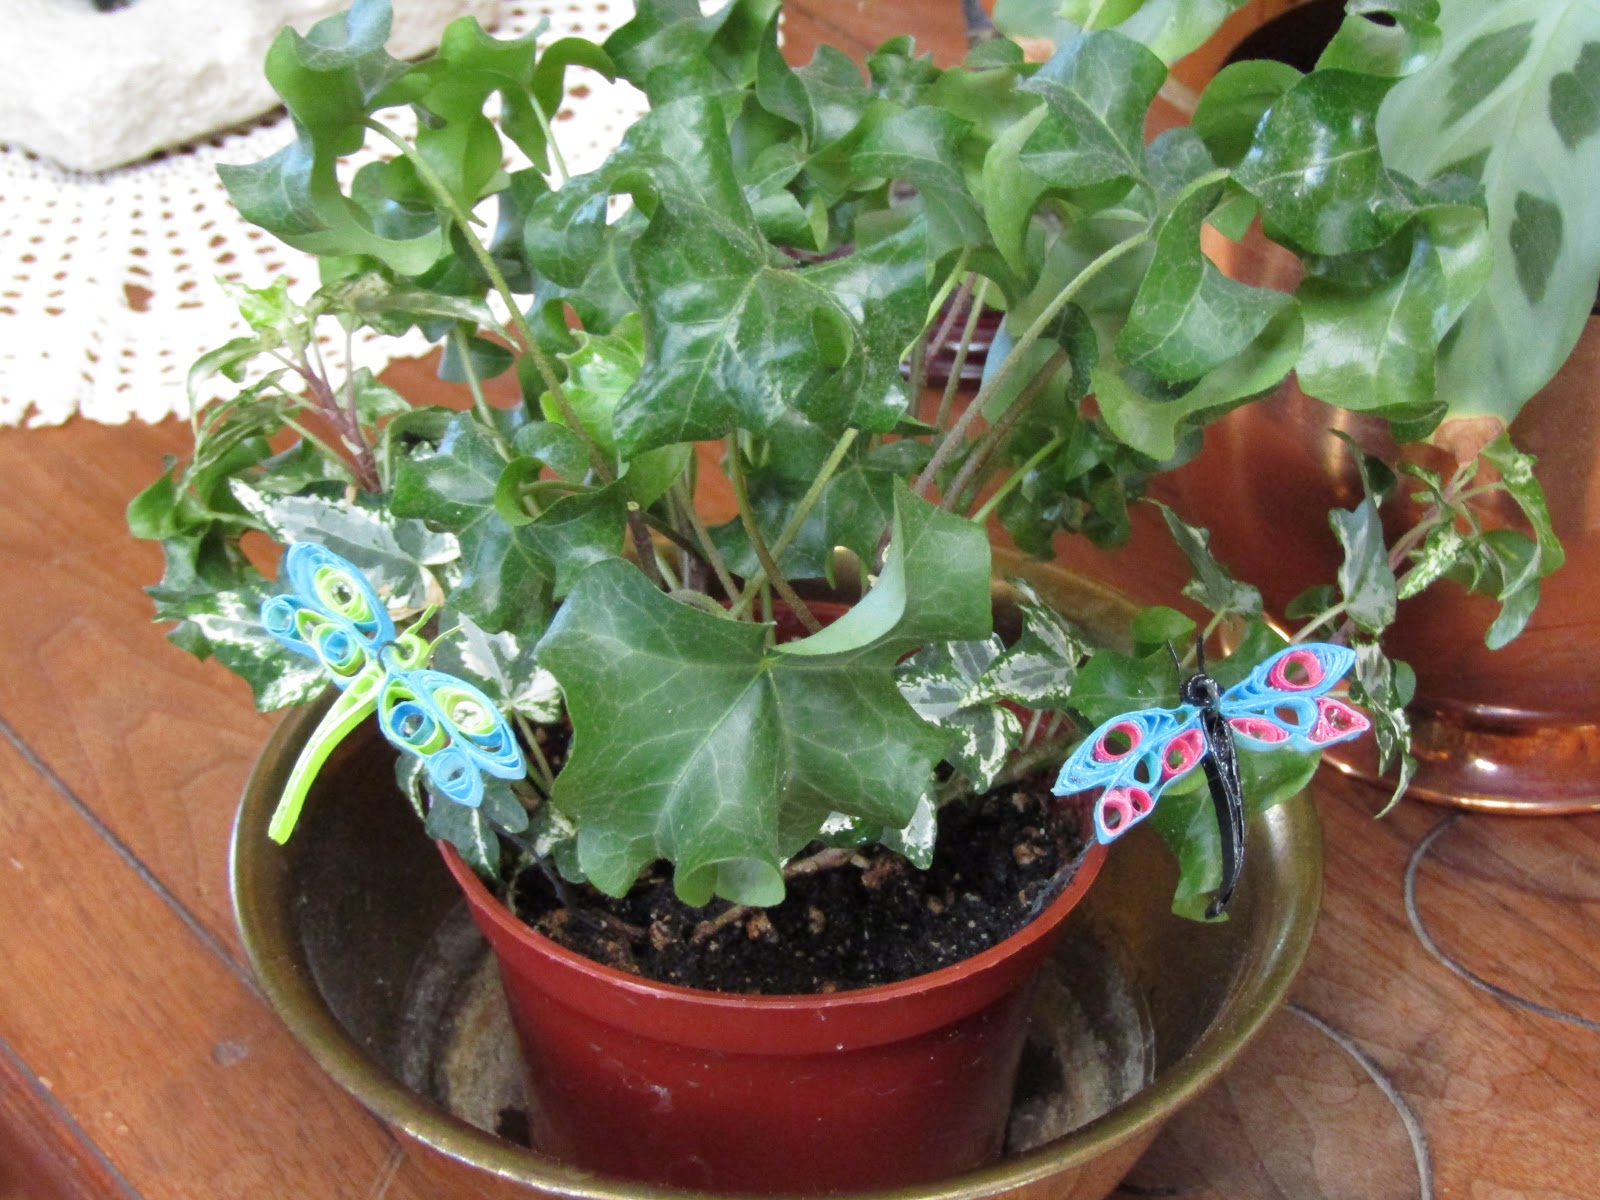
I decided to scale down a few of my regular ornaments and make 'ornaments for houseplants'. So far I have one pattern for a hummingbird, two patterns for butterflies and one for dragonflies. They are made with 1/8" paper and sealed with a heavy coat of gloss medium. The wire is threaded through before sealing so it is pretty sturdy.


I find I have to pick unnatural colours so that the ornaments show up against the green of the plants. I mean really,  a mauve and pink hummingbird? Any way, I think they are cute and that they will make a nice addition to any houseplant or artificial arrangement. I hope others think the same - lol
Here is a comparison photo of the dragonflies although I really should have  a coin in the picture to give a really good idea of sizes. I will be making more of these designs and I think I will have to come up with a bee pattern too!

I enjoy reading your comments so please leave one! Thanks for visiting.


Friday, 19 January 2018

A New Venture!

Last week one of my friends posted a video on Facebook and I just had to try it.  Have a look - Nail Polish Flowers

I didn't have coloured nail polish so I used some fluid acrylics to paint my flowers. For my first flowers I used a Sharpie to make the petals and just some white glue. I did buy some sparkle nail polish for the final touch.

Once they were done it was 'what now?' time. So I decided to make a little flower arrangement.
front

back

dragonfly closeup
My daughter, Susan, suggested that I could make dragonflies and butterflies with this method too - so I did! BTW, the little 'vase' is recycled from a garden solar light and the 'grasses' are made with quilling paper.

I wanted to see it I could make larger flowers, so I made a tube out of glue, tape and construction paper. The glue I used didn't work with the larger size petals and I had to do some experimenting to find something that worked. I ended up using some of my husband's WeldBond glue.

I enjoy making the flowers and experimenting making other shapes too but, I don't think that making arrangements is my thing. So, what to do with the decorations I do make? Add them to houseplants, of course!

Here is a picture of these with a white background so you can see them clearly.

I think I will have fun making more of these and I think they might sell - especially the insects as they would work well in dried flower arrangements too.

At any rate, it is another creative play for me and I like being busy and creative!


Saturday, 12 November 2016

A Shift in Focus

My mind really hasn't been on art for the last few months!

Since my husband's heart attack, I have been focused more on health and our diets. The second day Bob was in the hospital a friend loaned us "To Your Health" by Dr. Hans Diehl and I started reading. A few days later, another friend gave me "Eat to Live" by Joel Fuhrman, MD. We also got a book when Bob got out of the hospital - "Living Well with Heart Disease" from the Heart & Stroke Foundation.

I won't go into details about what I read but it was enough to get me started on a new diet lifestyle. The goal was to reduce sodium, fats and sugars which would improve blood pressure and promote weight loss. Using the recipes in the books and from the internet, I have been including many more vegetables as well as beans and lentils into our meals. There have been a few "I can't eat that" meals but most have worked out well and I now have about 20 recipes that will become staples. I have also modified a number of our favourite 'pre-heart attack' recipes to meet with the changes in our needs.

I know how easy it is to slide back into old habits so I am keeping a record of almost everything we eat and the nutrition information - sodium, fibre, calories, fat, sugar. So far things seem to be working; Bob has lost 10 lbs and I have lost 6. And, we are both feeling good about the changes - so, here's to a better future!

And, to show that I haven't completely ignored my art, here are a few of my latest quilling projects.


They are all made with my own painted paper cut to 1/4" and they are all about 3" x 3". These make super little ornaments for the Christmas tree or for year round. They can be hung, mounted and framed or fixed with some sticky tak to go on the wall or a mirror

I have a few other things on the go as well and maybe I will find the time to write about them soon . Now, I am off to figure out the nutrition for tonight's dinner - lol.

Thursday, 2 July 2015

Summer of Color #4

I made it! I really didn't think that I would be able to find the time this week to do a piece for the SOC #4 but I managed to find a few minutes here and there in the last two days and was able to complete a mixed media painting on a 7 x 14 gallery wrap canvas.
Red & Gold
The colors for this week were two reds and a metallic. The reds were no problem, of course, I used Cadmium Red Medium and Alizarin Crimson, standard colors in most painters' boxes. The metallic was a bit more challenging. I hunted through my stash of mixed media materials and came up with a few things that I thought would work together. The butterflies are from a gossamer thin napkin so I stuck them to a piece of gold paper and cut them out. The cross was a gift from a friend: it is made out of thin wood and I painted it with some gold gesso. I added some branches and leaves painted with the gold and voilĂ !

Here's another photo that makes the gold look a little more gold. As Kristin mentioned in our instructions part of the challenge would be to show the metallic quality of the art in a photo. I am not sure how well I accomplished this but I tried - lol.

If you want to check out some of the other art in this challenge, here is the link to Kristin's blog - http://www.twinkletwinklelikeastar.blogspot.ca/2015/06/the-summer-of-color-5-week-four.html

Saturday, 30 May 2015

Experimenting and Learning

I think most artists continue to experiment and learn throughout their careers. Whether one is a professional with long years of work behind them or a relative beginner, it is important to work at keeping your art fresh.

I am lucky in that way because my art students often ask to paint something that I have never painted before so while I am teaching, I am also learning. A few years ago, Teresa wanted to paint an Elk - antlers and all. She had her own photo to work from and I grabbed one off the internet. I had painted deer before but always in the distance so little detail was needed. For this picture, although I had no interest in photo-realism, I needed to put fuzz on the antlers and have a pretty decent looking face.
Big Boy 10 x 14 acrylic on paper
Recently my newest student, Jean, wanted to try a butterfly. She looked through my meagre butterfly reference material and chose a picture that left me somewhat aghast. "How was I going to teach her this? She has had about 12 lessons and this is pretty complicated"
This is a photo of a photo in an old Northlight Magazine, so the image isn't great BUT this is what Jean wanted to paint! It is "Peacock Sunning on Stones" by Sarais B. Crawshaw.

So I prepared a couple of watercolor canvases and some masking tape masques for the butterfly. We transferred the image on to the paper and applied the masques then we set about trying different ways to paint the rocks. Of course, we used a separate piece of paper: we tried salt, sea sponges, splatter with both screen and fingers - nothing seemed to be working. Finally I decided to try dry brush and it seem to work the best.

Before we could progress to our prepared canvases, Jean decided that she really didn't want to do this picture after all and she would look for another reference.

However my interest was caught! Could I reproduce this picture? I don't normally copy another artist's work but this presented a real challenge and I couldn't resist.
Peacock Butterfly 8 x 10 watercolor
I am pretty happy with the way this painting turned out and I am glad I did it because I learned a lot.

Now comes the thorny question - can I sell this painting? I am not likely to compete in the same market as Sarais B. Crawshaw but even if I credit her on the back of my painting it doesn't strike me as ethical. This question has come up a number of times in the Art Club I belong to but the answers have always been split. What is your take on this question?


Friday, 23 January 2015

DAY 23 - Using White

Most watercolor artists don't use white paint - they use the white of the paper and blend their color into the white with water. This is difficult with rice paper because the paint doesn't blend and more water just makes blooms. I was lucky to find an old tube of white paint in my drawer so I could do some of these paintings. The tube was all dried up but I just cut off the end and peeled away the casing and the paint was ready to use!

Poppy & Butterfly
Loading the brush with white then dipping the tip in Alizarin and making your stroke with a bit of a swirl reminds me of tole painting. Most of the elements in this painting used white so the colors are a bit muted and possibly less vibrant.

"Poppy & Butterfly is a 5.5 x 6 watercolor on rice paper, priced at $25.00. If you are interested in any of the challenge paintings contact me through the website at - http://www.mellowood.ca/art/index.html or comment here.

Don't forget to check out all of the art at http://lesliesaeta.blogspot.ca/ and then go to http://paintamasterpiece.blogspot.ca/ to vote on the paintings posted there.

I wish everyone a great weekend and hope you will check tomorrow for the next painting in the 30 paintings in 30 days challenge.

Saturday, 17 January 2015

DAY 17 - Leftovers? Garbage?

During my first workshop with local artist Win Dinn (check out her blog here - http://windinnart.blogspot.ca/) I discovered that leftovers and garbage are really just supplies for more mixed media art.
Buttons and Butterflies
When I finished painting "Tulips" the other day, I had way too much paint left over. So, I took some leftover mat board and started applying some of the paint, blotting runs and overages with paper towel. I left the mat to dry and the paper towel in a loose bail on my table. Last night, I had a look at the painted mat thinking I would use it for a background for a new painting but it didn't 'speak' to me.

However, the paper towel (once I opened it up) really caught my fancy and I immediately stuck it on an 8 x 10 canvas using gloss medium and wrapping it around the edges for a finished look. Then I started cutting up the mat board using moon shapes - I have way too many of these so I see another project in the future.

Once my canvas was dry I began to add some of the moon shapes, some leftover buttons and some of my crocheted butterflies and, voilĂ  a finished painting!

For more art check out http://lesliesaeta.blogspot.ca/ and then go and vote at - http://paintamasterpiece.blogspot.ca/